PEROGOL.... JUGA SUAMI - mymetro
KUALA TERENGGANU: Hanya kerana mahu menutup malu keluarga selepas anaknya dirogol dan mengandung anak luar nikah, seorang bapa sanggup mengahwinkan anak gadisnya itu dengan perogol terbabit, walaupun menyedari tindakannya itu bakal menjerat diri.
Ternyata, tindakannya itu tidak menyelesaikan masalah berkenaan, malah menyebabkan mangsa fobia dan trauma akibat dirogol selain terpaksa berdepan perogolnya yang juga suaminya.
Untuk memastikan dirinya tidak diganggu, mangsa sanggup menyembunyikan diri kerana takut berdepan suaminya itu.
Lebih malang, mangsa juga terpaksa menanggung malu bersendirian selepas pelbagai tohmahan dilemparkan jiran kerana mendakwa dirinya gadis liar dan mengandung anak haram.
..........
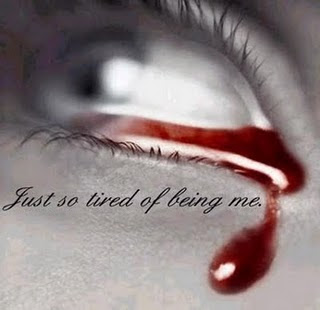
bayangkan hari2 malang yg akn terus dtempuhinya. hari2 seterusnya yg tiada siapa akn tahu sudahnya. lelehknlah air mata darah sekali pun. duka tdk sesekali mereput. duka tdk pernah mudah untuk luput. berdoalah atas kesejahteraan diri. doa kamu adalah doa yg akn dmakbulkan. tabah lah kerna masa depan pasti akn lebih baik. doaku..
KISAH MASYARAKAT YANG DIKETEPI
KISAH YANG LEBIH MENYENTUH HATI DARI TITANIC
KISAH CERITA MANUSIA YANG TIADA SIAPA AMBIL PEDULI
KISAH CERITA INSAN BER-AYAH, BER-IBU TP MEMENTINGKN AIR MUKA
KISAH CERITA TRAGIS MENDEPANI PEROGOL YG 'HALAL' KE ATASNYA
KISAH TRAGIK MAHA DUKALARA SEORANG PEREMPUAN
KISAH YG DPT MERUNTUN JIWA MANUSIA SEJAGAT
INILAH KISAH LARA MANUSIA TANPA PLIHAN
AIR MATA AKU HALAL UNTUK JATUH..
24 Mei 2010
TUTORIAL : APPLY VINTAGE TO SEVERAL IMAGES USING ACTIONS
MENGEDIT GAMBAR KE EFEK VINTAGE
BEBERAPE GAMBAR DENGAN SEKALIRAP
Tutorial Details / Basix, Tools & Tips
* Program: Adobe Photoshop CS3+
* Difficulty: Beginner
* Estimated Completion Time: 5 - 10 Minute
Step 1
In my particular case , I decided to apply a vintage effect to all the photos in a folder on my machine. So the first step is to open a folder with all the photos you want to apply an effect to.
Step 2
Next, choose a random photograph and open it in Photoshop.
To apply the same effect to all the photos you will need to create an action. Go to the actions panel and press the New Action button. Name it Action 1.
Press record.
Step 3
In this step I will detail all the steps I took to apply a vintage effect to my images but you should feel free to apply any effects that you see fit, depending on your project. Keep in mind that you are recording so every step you take from this moment on will be recorded until you press the Stop button.
Apply an Adjustment Layer > Hue/Saturation.
Go to Filter > Blur > Gaussian Blur: 4 px. Layer Blending Mode: Soft Light. Opacity: 70%.
Go to Image > Adjustments > Variations (2 clicks on more cyan ). Blending mode: Overlay. Opacity: 80%.
Go to Filter > Other > High pass: 3 px. Layer Blending Mode: Soft Light.
Go to Adjustment Layer > Gradient Map. Opacity: 60%.
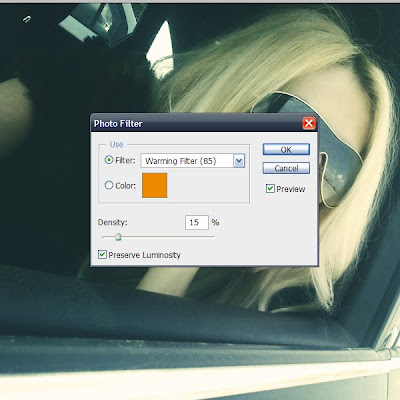
Go to Adjustment Layer > Photo Filter: 15%.
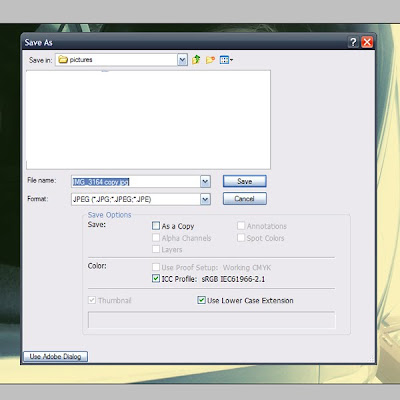
Now let’s save our work as a JPEG. This is very important because it needs to be recorded as an action. Name it as Copy as shown below.
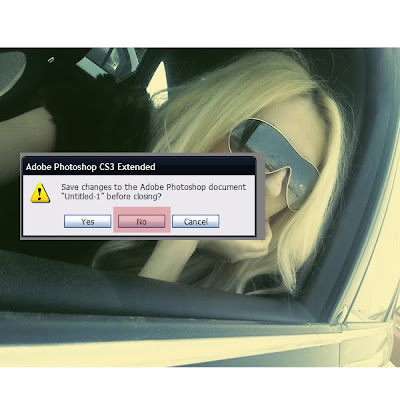
Next, close the document. When prompted to save the changes in a PSD, select No. This is necessary because otherwise Photoshop will ask you the same question for all your photos.
Step 4
Now the action is ready. Press the Stop button.
Step 5
Go to File > Automate > Batch. Select Action 1, go to Source and select the folder in which your photos are located. Check Suppress File Open Options Dialog and press Ok.
Step 6
Sit back and watch as Photoshop does all the work for.
Conclusion
That’s it! We’re finished! Hope you learned something new!
Labels:
TUTORIAL
Langgan:
Catatan (Atom)